I'm in the process of making some curtains for my new apartment. I have two long windows that have those awful metal blinds covering them. See, ugly.
Since I'm renting and I can't uninstall the ugly things, my plan is just to keep them permanently pulled up and let the curtains do the work of blocking out the sun/providing privacy. Not only are the curtains way WAY more aesthetically pleasing, but the cats used to love the sound the metal blinds made when scratched.
I'll tell you more about the actual curtains later. Today, I want to tell you about covered buttons. My curtains have decorative buttons sewn along the top where the curtain goes over the rod so that it looks like they're buttoned on (they're not, the buttons are just there for show, it's one of those "useless-but-pretty" things.) If you've ever gone on a hunt for the perfect buttons, you know the anxiety that can accompany button shopping. It feels like nothing is exactly right. Enter the magic of the covered buttons.
Covered buttons are a metal frame that you "cover" with fabric, meaning you can make it match any sewing project exactly. If you use the same fabric as your project, once the button is covered, it looks like it was made for your project... which it was. Here is what you need.
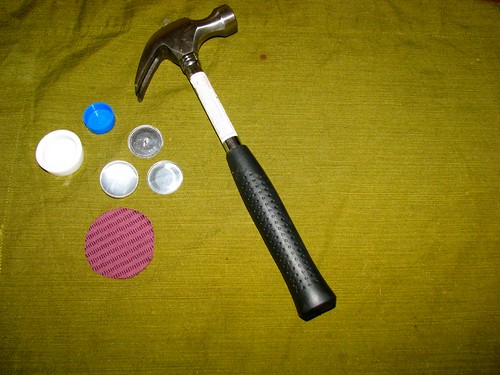
That is a hammer (for pounding), a circle of fabric cut about 1/4" bigger around than your actual button, and the covered-button assembly kit. You can buy covered button kits in most fabric-type stores. I got mine at Jo-Ann Fabrics. The kit I got had traditional "button" backs with the button shank and flat backs with no shank in case you just want to glue your button to a flat surface. The white and blue plastic pieces are the assembly pieces. The first kit you buy will need to have these pieces. After that, if you save them, (I always lose them and so am constantly buying the "starter set") you can just buy the "refill" packs that just have the button parts and no assembly pieces.
First: lay the fabric with the side you want showing facing down over the white plastic bottom assembly piece and push the button top into the white piece on top of it. This will cause the excess 1/4 inch of fabric to bunch up around the edges of the button.
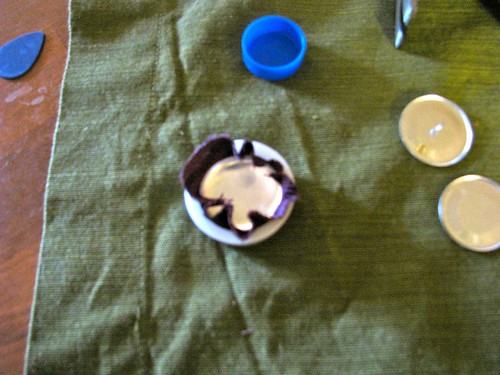
Next: squish all the fabric ends to the inside of the button and place the button back on top so that no fabric ends are showing.
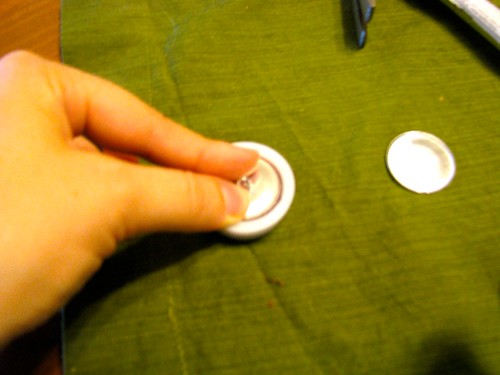
Next: take the blue assembly piece and place it over the shank (if you're using backs without shanks just center it over the back of the button.
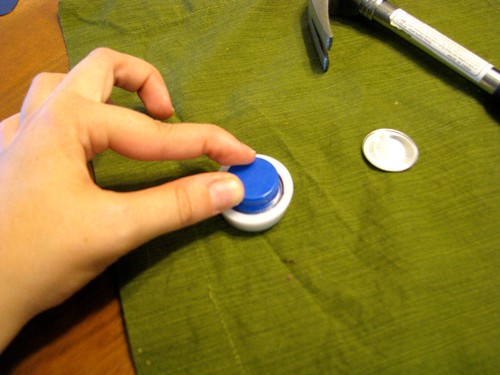
Next: whack the blue piece (watch your thumbs!) with your hammer a few times. You should feel the button back pop into place. Pop the button out of the bottom of the assembly piece. TA-DA!
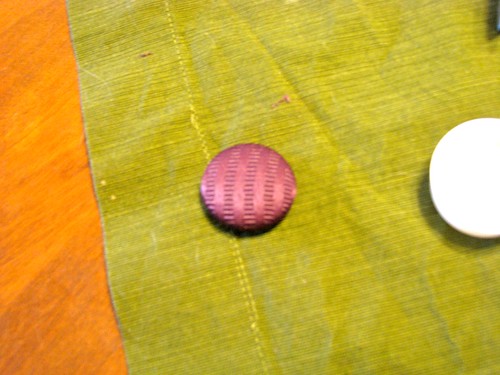
Now you have a button that will perfectly match any project no matter how unusual the color or interesting the print. No more settling for buttons that are a "close enough" color.
No comments:
Post a Comment